
The stage we’ve all been waiting for!
The Thread Painting of Chisum
…has been mostly completed!

To have a quilt portrait commissioned of your pet, leave me a comment or email me at laurasapko@gmail.com
I executed the thread painting of Chisum in two stages which I will break down for you – first on stabilizer and then finished it as the quilt sandwich.
Here he is with very little left to do on his leg and the background. But I am leaving for a while to visit a new grandson so this will have to wait for a few weeks to be fully completed. Select the photo to enlarge.
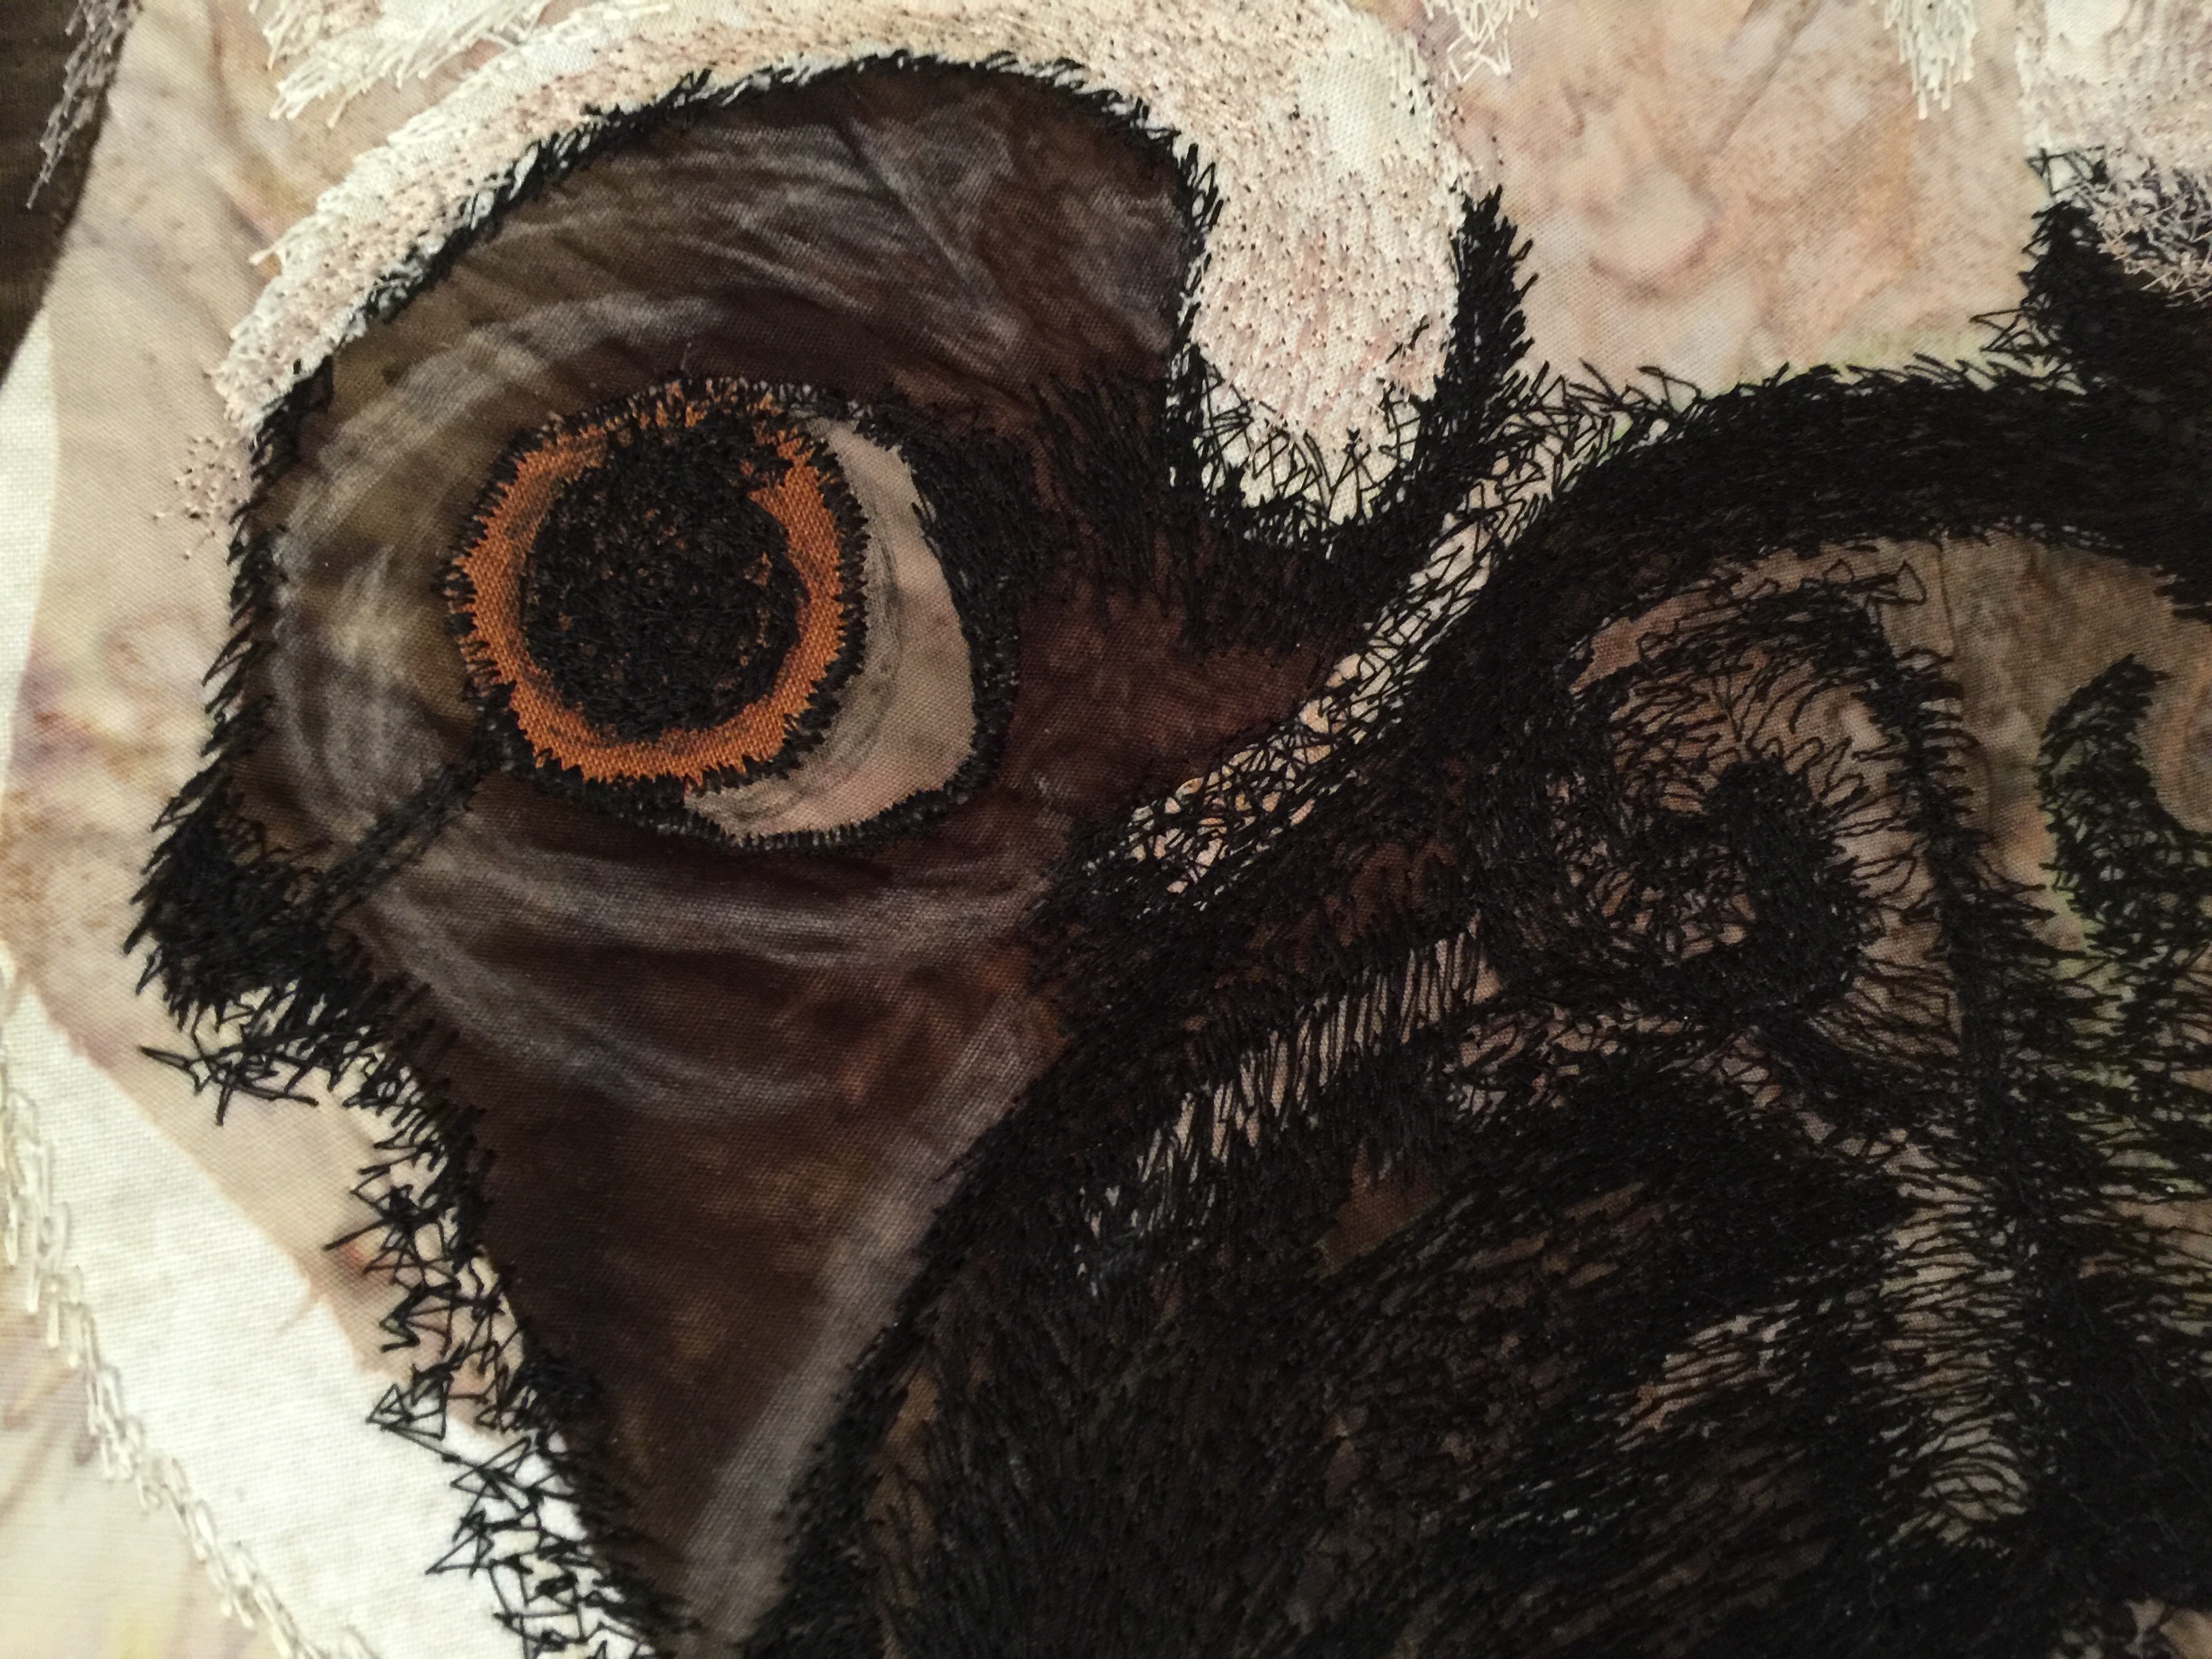
In the first stage of the thread painting, I have thread painted Chisum’s cute little puggy face on the quilt top only first ,with stabilizer, quite heavily with black thread. Below you can see how much the “painting” defined simple shapes and mixed with the fabric color to create even finer layers of detail. The batiks added some detail I wanted to keep which also help define a face roll or other highlights but adding a little black thread added even more color and detail.
It’s very,VERY important to notice the direction of the fur when thread painting and mimic that direction to maintain life likeness. When using the zig-zag stitch this requires a lot of rotating of the quilt. I did at times also use the straight stitch when I wanted less application of thread – it takes longer to build up thread with the straight stitch. Select the photo to enlarge.


In some areas I use zig-zag in a meandering or circular way to get a more random application that is great for shading effects – much like cross hatching when you sketch.

I like to draw on the fabric with a chalk pencil to map out where I want thread painting to go by looking at the photo source for direction. It helps since you have to turn the piece for the thread to go in the direction you want it to. Draw your chalks strokes in the direction you want to stitch them too!

And the wonderful surprise is what it looks like on the back side! Select the photo to enlarge.

I like it so much that it has me thinking I will do a black and white rendering in thread! Unfortunately this lovely detail on the back will be hidden in the quilt sandwich! But I was sure to get a good photo. Select the photo to enlarge.
Why the two stages of thread painting? The stitching is pretty dense in the black areas and dense stitching tends to draw in on the fabric and flatten a quilt sandwich so it’s best NOT to do a lot of heavy “painting” on a quilt sandwich.
The “painting” I did on Chisum’s body is more spread out and on the level of quilting as far as density goes. The shadow pieces have the most application of thread on the edges and then loose stitching through out his body to get the feel off fur. It also provides quilted texture and movement and helps give the sense of dimension when you pay attention to the way the fur curves. I also let the fabric I chose represent the shadow and did not add more with thread – that would have built up too much and flattened te sandwhich. And I really want the focus to be on Chisum’s face so I chose the body to e treated more simply and the background even more so.
All I have left to do is a little of the light tan stitching on his paw (I ran out!), some simple quilting on the blue cushion and the finishing binding. I will post the finished piece as soon as it’s done.
Please ask questions and let me know if this tutorial was helpful and give your suggestions for others thread painting projects or tutorials! I would love to do more!
This handsome dude comes from Black Powder Farm Little Dogs in SE Kansas!
To have a quilt commissioned of your pet, leave me a comment visit my store.


Oh my , how handsome is he!!!
Can’t wait to see him. That’s an awesome job you did Mrs Laura., just like everything else. Wonderful job!!!
Thank you Maria! A someday project for you maybe?